- Welcome to TMS Help
- Basic Operations
- My TMS
- Document Control
- Adding and Managing Documents
- Document Titles, Descriptions, and IDs
- Document Information Fields
- Adding a New Document
- Document List Page
- Viewing Information About a Document
- Viewing the Actual Document
- Requires Current Training to View Documents Flag
- Editing Document Information
- Deleting a Document
- Retiring or Obsoleting Documents
- Review and Sign-Off Workflow
- Review Activity
- Signature Activity
- Document Control Tasks: General Users
- Document Control Tasks: Document Reviewers
- Document Control Tasks: Pro-Active Reviewers and Document Owners
- Managing Review Groups
- Running a Proactive Review to Determine Documents That Require Review
- Conducting a Review
- Monitoring Review Status
- Accepting Reviewer Changes to a Document
- Initiating the Signoff Process
- Publishing the Document Revision
- Document Dashboard
- Additional Document Review Tasks
- Additional Document Review Information
- Adding and Managing Documents
- Training Center
- Training Manager Tasks
- How Users Are Linked to Training Requirements
- Sending Training Notifications
- How Training Notifications Are Sent to Users
- Notification Activities
- Sending Training Notifications During Move to Current
- Sending Training Notification for an Individual User
- Sending Training Notices for an Individual Document
- Sending Standalone Quiz Activities
- How Training Requirements Are Sent to Managers
- Monitoring Training Status
- Additional Training Coordination Tasks
- Manager Sign-Off on Training Activities
- Creating and Managing Quizzes
- Quiz Overview
- Definitions and Icon Descriptions
- Permission Setting for the Quiz Module
- Quiz Module Parameter Settings in Application Options
- Creating the Master Question List
- Inactivating a Question
- Viewing the Master Question List
- Adding a Quiz
- Viewing a Quiz
- Taking a Quiz
- Automatic Quiz Result Notifications to Managers
- Printing a Quiz to Be Taken Manually
- Merging a Quiz with Document Routing
- Check List for Implementing the Quiz Module
- Training Manager Tasks
- Change Control
- eForms
- eForm Terms and Icon Descriptions
- Adding and Editing a Form Design
- Adding Form Permissions for Manual Forms
- Locking and Unlocking a Form
- Editing the Packet Number
- Adding a Field
- Form Field Definitions
- Field Types
- Free Form Text Box (2000)
- Free Form Text Box (Unlimited)
- Free Form Text Editor (2000)
- Free Form Text Editor (Unlimited)
- Number
- Number (Within Range)
- Date/Time
- Checkbox
- True/False
- Drop-Down List (Single)
- Drop-Down List (Multiple)
- Object List (Single)
- Object List (Multiple)
- File Attachments
- Signature
- Auto-Close Packet When Completed (Manual Forms)
- Show Preview for Form Design
- Opening Packet Information
- Field Parameters Box
- Field Parameters
- Field Parameter Examples
- Adding Facilities
- Deleting Facilities
- Adding Activity Categories
- Adding Activities
- Adding Activities to the Form (Manual Form Only)
- Adding Help Text
- Form Design Reports
- Form Templates
- Multi-Level Lists
- Value Map Lists
- Deleting and Inactivating a Field
- Adding Form Data
- Deleting Form Data
- Viewing Form Data
- Setting up Competency Assessments
- Limit Form Displaying
- Limit Access to the Add Button
- Forms Extractor
- Closing a Packet
- Using Form Information
- Searching for Form Information
- Linking Forms Together
- Opening a Closed Packet
- Form Dashboard
- Length of Time Dashboards
- Risk Assessment
- Launching an Individual Child Packet for Each Sub Form Recipient
- Reassigning or Canceling a Packet Connected to a Workflow
- Launching a Change Order from a Form Packet
- Checklist for Implementing Online Forms
- Designing Form Groups and Workflows
- Reports & Dashboards
- Tools & Setup
- Documents and Training
- eForms on Tools & Setup
- Setup
- Users
- Departments
- Locations
- Facilities
- Drop Down Lists
- Free-Use Fields
- Permission Groups
- Advanced
Home > Tools & Setup > Setup > Permission Groups > Adding a Permission Group
Adding a Permission Group
To add a new permission group:
- Click the Permission Group link.
The Permission Group List page displays.
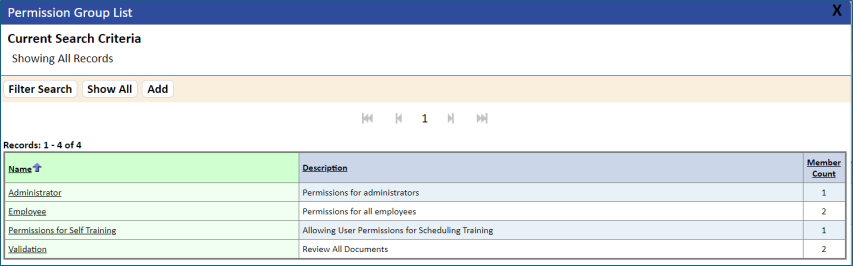
- Click the Add button.
The New Permission Group page displays.
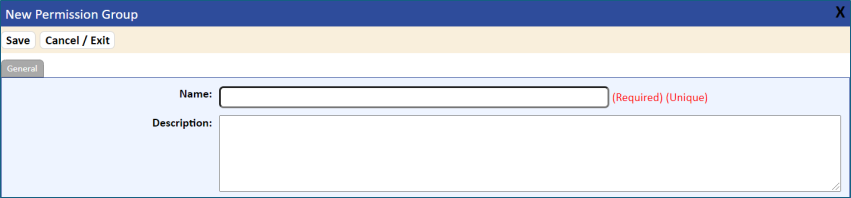
- In the General tab, enter the name and the description of the new permission group.
- Click the Save button.
The Permission Group Detail page displays.
- To add a member to this permission group, select the user name in the Available Users list, then click the Add Item button.
Members can belong to more than one group.
- To remove a user, select the user name in the Members list, and then click the Delete Item button.
- Set the permission options in the Global, Local, and General Permissions tabs.
For more information about these, refer to Global Permissions, Location Permissions and General Permissions.
- To save the new permission group, click the Save button.
The permission group is added to the Permission Group List.