- Welcome to TMS Help
- Basic Operations
- My TMS
- Document Control
- Adding and Managing Documents
- Document Titles, Descriptions, and IDs
- Document Information Fields
- Adding a New Document
- Document List Page
- Viewing Information About a Document
- Viewing the Actual Document
- Requires Current Training to View Documents Flag
- Editing Document Information
- Deleting a Document
- Retiring or Obsoleting Documents
- Review and Sign-Off Workflow
- Review Activity
- Signature Activity
- Document Control Tasks: General Users
- Document Control Tasks: Document Reviewers
- Document Control Tasks: Pro-Active Reviewers and Document Owners
- Managing Review Groups
- Running a Proactive Review to Determine Documents That Require Review
- Conducting a Review
- Monitoring Review Status
- Accepting Reviewer Changes to a Document
- Initiating the Signoff Process
- Publishing the Document Revision
- Document Dashboard
- Additional Document Review Tasks
- Additional Document Review Information
- Adding and Managing Documents
- Training Center
- Training Manager Tasks
- How Users Are Linked to Training Requirements
- Sending Training Notifications
- How Training Notifications Are Sent to Users
- Notification Activities
- Sending Training Notifications During Move to Current
- Sending Training Notification for an Individual User
- Sending Training Notices for an Individual Document
- Sending Standalone Quiz Activities
- How Training Requirements Are Sent to Managers
- Monitoring Training Status
- Additional Training Coordination Tasks
- Manager Sign-Off on Training Activities
- Creating and Managing Quizzes
- Quiz Overview
- Definitions and Icon Descriptions
- Permission Setting for the Quiz Module
- Quiz Module Parameter Settings in Application Options
- Creating the Master Question List
- Inactivating a Question
- Viewing the Master Question List
- Adding a Quiz
- Viewing a Quiz
- Taking a Quiz
- Automatic Quiz Result Notifications to Managers
- Printing a Quiz to Be Taken Manually
- Merging a Quiz with Document Routing
- Check List for Implementing the Quiz Module
- Training Manager Tasks
- Change Control
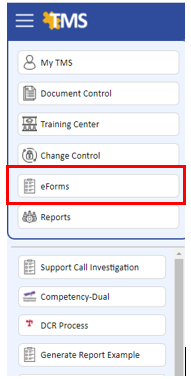
- eForms
- eForm Terms and Icon Descriptions
- Adding and Editing a Form Design
- Adding Form Permissions for Manual Forms
- Locking and Unlocking a Form
- Editing the Packet Number
- Adding a Field
- Form Field Definitions
- Field Types
- Free Form Text Box (2000)
- Free Form Text Box (Unlimited)
- Free Form Text Editor (2000)
- Free Form Text Editor (Unlimited)
- Number
- Number (Within Range)
- Date/Time
- Checkbox
- True/False
- Drop-Down List (Single)
- Drop-Down List (Multiple)
- Object List (Single)
- Object List (Multiple)
- File Attachments
- Signature
- Auto-Close Packet When Completed (Manual Forms)
- Show Preview for Form Design
- Opening Packet Information
- Field Parameters Box
- Field Parameters
- Field Parameter Examples
- Adding Facilities
- Deleting Facilities
- Adding Activity Categories
- Adding Activities
- Adding Activities to the Form (Manual Form Only)
- Adding Help Text
- Form Design Reports
- Form Templates
- Multi-Level Lists
- Value Map Lists
- Deleting and Inactivating a Field
- Adding Form Data
- Deleting Form Data
- Viewing Form Data
- Setting up Competency Assessments
- Limit Form Displaying
- Limit Access to the Add Button
- Forms Extractor
- Closing a Packet
- Using Form Information
- Searching for Form Information
- Linking Forms Together
- Opening a Closed Packet
- Form Dashboard
- Length of Time Dashboards
- Risk Assessment
- Launching an Individual Child Packet for Each Sub Form Recipient
- Reassigning or Canceling a Packet Connected to a Workflow
- Launching a Change Order from a Form Packet
- Checklist for Implementing Online Forms
- Designing Form Groups and Workflows
- Reports & Dashboards
- Tools & Setup
- Documents and Training
- eForms on Tools & Setup
- Setup
- Users
- Departments
- Locations
- Facilities
- Drop Down Lists
- Free-Use Fields
- Permission Groups
- Advanced
Using Form Information
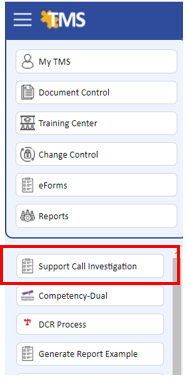
To use a form after design, the form name will display on the side panel under the menu option called eForms . You must set permissions under the Location Permission group to allow for viewing the forms. Forms are assigned to locations exactly the same way documents are assigned to locations. You must have permissions to view forms at the assigned location.
To add form data:
- Click eForms on the Main Menu side panel.
- Select the name of the form.
- Click the Add button or the Add New Packet link.
- Enter the following fields:
-
- Description A summary of packet information.
- Location Sets permissions to packet.
- Type Allows for filtering.
- Facility Used to create the packet ID number.
- On a manual form, click the Save button and then click the link for the corresponding pages of the form and then click the Edit button. You must have Read/Write permissions to the form to enter data.
The form page will now be in edit mode and you will be able to enter data.
- Click the Save button to save the form.
- When finished, if a manual form has been designed with a Send Notification button, you can click this button to forward the form to a designated individual.
For a form with an automatic workflow, select the Finished/Next Step button
- Selecting the form links at the top of each page will take you to the corresponding pages.
On a form with an automatic workflow, form navigation is enabled if the Allow Form Navigation checkbox is checked for the workflow step.