Viewing and Managing All Activities
TMS enables individuals or administrators who have the appropriate permissions to access the following information for each activity in the system:
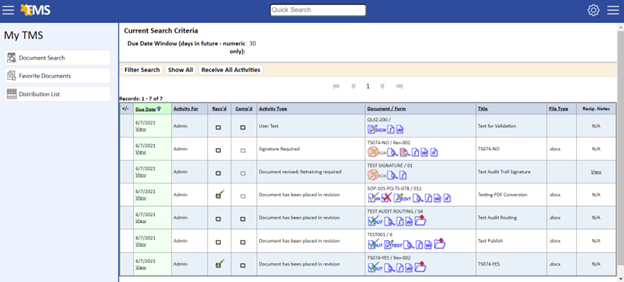
- Due date and type of activity
- Employee associated with the activity
- Whether an employee has confirmed receiving notification of an activity and the date it was received
- Whether an employee has confirmed completing the activity and the date it was completed
- Description of the notification message
- Name of the person who sent the activity notification and the date it was sent
For activities related to a specific document, the following additional information is available:
- ID of the document associated with the activity
- A document’s current revision number and the new revision number assigned to the document in review
- Name of the review group for the document and all members of the group
- Additional notes, if any, associated with the document
To view and manage activities: Click the Activity List link under Management on the Main Menu side panel.
To access the Activity List, users must belong to a permission group that has Read/Write or Read Only access to View All Activities under Global Permissions. (Refer to Adding a Permission Group for information on accessing the Manage Activities function.)
The User Activities page displays, listing all user activities.
From this window you can perform the operations listed in the following table.
| Table 7-4 Activity Detail Page Operations | |
| To: | Do This: |
| View the Activity Details page for an activity | Click the activity’s View link under the Due Date column. |
| View the information about the document | Click the |
| View the current version of the document | Click the |
| Check out the new revision for reviewing | Click the |
| Open the document for reviewing and editing | Click the |
| Open the redline copy of the document | Click the |
| Cancel a check‑out session | Click the |
| Check in the new revision when you are done reviewing it | Click the |
| Signoff on an activity | Click the |
| Delete an activity | Select the checkbox in the Delete column for each activity you want to delete, and then click the Delete button. You are prompted to confirm the deletion. You must be the Review Group Administrator for the documents that reference the activity. |
To change an activity due date:
- Select Activity Due Date Edit under Reports on the Main Menu side panel.
- Use the Filter Search criteria to display the activities you would like to change.
Filter Search allows for selecting: Sender, Due Date of Activity, Activity For, Activity Type, Recv’d, Comp’d, Documents, Change Orders, and Due Date Window (Days in Future).
- You can either change the due dates individually by selecting the calendar widget on each activity, or you can do a mass change by selecting the calendar widget for Change ALL Due Dates To.
- Click the Save button to change all the selected activities.
