Multi-Level Lists
Multi-level lists allow you to create a tree structure when building a selection list.
For example, if you are designing a Corrective Action form and would like a functional areas tree, you could use the multi-level lists capabilities. These lists can then be added to a form during the field definition design phase. You have the option of making the list either a single-select or multiple-select list.
To add a multi-level list:
- Click Multi-Level Lists under Setup on the Tools & Setup panel.
The Multi-Level Lists page displays.
- Click the Add New Multi-Level List link at the upper left corner of the page.
The Edit Multi-Level List page displays.
- Enter the name and description of the multi-level list. Often, the same entry is used for both of these.
- In the New Item Text field, add your first item and then click the Add New Item link.
The item is added to the List Items box.
- To add new items under an existing item, creating a tree effect, select the item to highlight it. Then, use the New Item Text field and Add New Item link to add additional items under your selection.
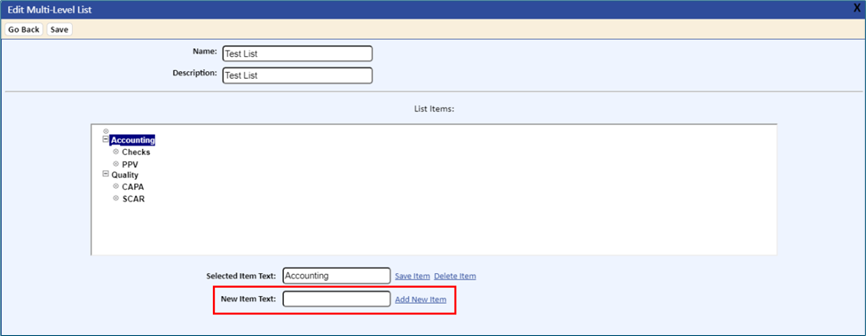
- To change or delete an item, select the item.
The item displays in the Selected Item Text field. In the Selected Item Text field:
- To change the item name, enter the new name and click the Save Item link.
- To delete the item, click the Delete Item link.
The List Items display is updated accordingly.
- When you are done editing, click the Save button.
To delete a multi-level list:
- Click Multi-Level Lists under Setup on the Tools & Setup panel.
The Multi-Level Lists page displays.
- Click the Delete
 icon next to multi-list you would like to delete. Make sure the list is not currently used by an existing form.
