Adding and Editing a Form Group
To add a Form Group:
- Click Form Design under eForms on the Tools & Setup window
The Form Group List page displays.
- Click the Add button.
The New Form Group page displays.
- In the fields provided, add a Form Group Name and Form Group Description.
- Click the <li value=”1″> button.
The Form Group Detail page displays.
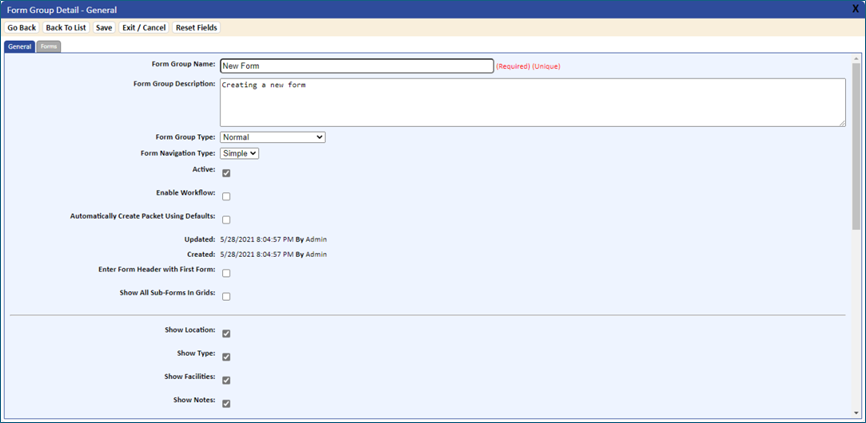
- Select a Form Group Type of either Normal or Competency Assessment.
-
- Normal is used to design a basic Form Group
- Competency Assessment is used to design a Form Group or Packet that is used to issue quizzes from the forms and store quiz results. It also allows for attaching other forms such as checklist and observation fields. In addition, it can be used when multiple signatures are required for signing off on training.
- Select a Form Navigation Type of Simple, which is used for basic form design. (The Sub-Grouped option is no longer valid.)
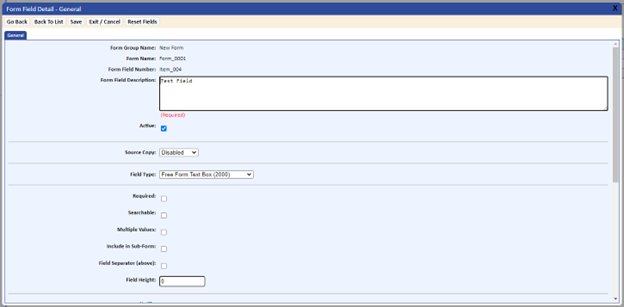
- Complete the remaining fields and options as needed.
For information about the fields and options available fields for the Forms Group Detail page, refer to the table that follows this procedure.
- When finished, click the Save button.
|
Table 10-6 Packet Settings Defaults |
|
|
Field/Option |
Description |
|
Active |
If selected, this indicates that the Packet is active and will display on the side panel. |
|
Enable Workflow |
If selected, the system will allow you to assign a created workflow. This option is usually not selected until you create a workflow to attach to the packet. Refer to Linking Forms Together and Activities/Workflow Status Page for more information. |
|
Default Workflow |
A list will include all possible workflows located on the Workflow List menu option. This list is added to the page after the entries have been saved and the Enable Workflow option was selected. Clicking the Workflow Toggle |
|
Automatically Create Packet Using Defaults |
If selected, the defined defaults will be used when creating a new packet. It can be used for both a workflow form and a manual form. However, if the form is attached to a workflow, it will be automatically set to YES. The packet defaults are as follows: ·Location ·Type ·Facilities ·Notes ·Attachments |
|
Updated And Created By |
These fields are used as references and are maintained by the system. |
|
Enter Form Header With First Form |
This option is used if using a manual form. If selected, the system allows for packet header information to be entered on the first form. If the form is attached to a workflow, all packet header fields are automatically entered with the first form and this setting does not apply to forms attached to workflow. If a default workflow is selected, this option will automatically be selected. |
|
Show All Sub-Forms In Grids |
This feature allows for displaying sub-form information in a horizontal grid. For example sub-forms, refer to Sample Sub-Form Settings |
|
Show Location |
If unselected, the Location field will not display when adding a new packet. However, because it is a required field, the Default Location will automatically be assigned to the packet. If a user has the ability to override the default setting defined in their permission group under the General Permissions tab (Show All Packet Header Fields), the Location field will display when adding a new packet. NOTE: Currently this setting must be left checked (set to YES) if using a Form Packet without a workflow.
|
|
Show Type |
If selected, the Type field will display when adding a new packet. |
|
Show Facilities |
If selected, the Facilities field will display when adding a new packet. |
|
Show Notes |
If selected, the packet field for Miscellaneous Notes will display when adding a new packet. |
|
Show Attachments |
If selected, the system will allow for attachments to display in the packet header or in the first part of the form when adding a new packet. |
|
Lock Location (except Admin) |
If selected, the location assigned during packet creation is locked. Only individuals with administrative rights to the packet location will be able to edit this field. |
|
Lock Facilities (except Admin) |
If selected, the facility assigned to the packet during packet creation is locked. Only individuals with administrative rights to the packet location will be able to edit this field. |
|
Show On Home Page |
If selected, this form will display on the home page as an image (icon). |
|
Form Image File |
Drop-down list that allows for selecting an image (icon) to represent the form on the side menu. Some included icons are Customer Compliant, CAPA, Non-Conformance, Competency Assessment, Deviation, Investigation, Observations, Pest Control, Supplier, and a series of generic icons for miscellaneous forms. NOTE: Custom image files can be designed and added to the drop-down list. Images are stored on the application server in the directory:
TMS_Web\Webroot\Themes\TMS_Default\Images\Custom |
|
Include Form Group In Dashboard |
If selected, will display data in a graph format on the Form Dashboard page (refer to Form Dashboard for additional information). |
|
Field To Include In Root Cause Graph |
Available for selection if the Include Form Group In Dashboard option is selected. Select the drop-down list to be included in the creation of the root cause graph on the Form Dashboard page. This graph will display as a pie chart (refer to Form Dashboard for additional information). |
|
Include Form Group In Risk Assessment |
If selected, will display a Risk Assessment Graph link under the Management menu option. This graph will use the system provided Probability and Severity drop-down lists if defined in a Form Packet. Refer to Risk Assessment for additional information on setting up the Risk Assessment graph. |
|
Probability Field To Include In Risk Assessment |
Available for selection when the Include From Group In Risk Assessment option is selected. Select the drop-down list that refers to the Probability drop-down list defined in the form packet. |
|
Severity Field To Include In Risk Assessment |
Available for selection when the Include From Group In Risk Assessment option is selected. Select the drop-down list that refers to the Severity drop-down list defined in the form packet. |
|
Packet ID Pattern |
The Packet ID pattern allows for designing the format of your packet number. If this field is blank, the system will use the first three letters of the default facility and a 5‑digit sequential number. If no facility is selected as the default, a MULTI identifier will be used. The Packet ID pattern can be used for a standard form or a form attached to a workflow. Refer to Editing the Packet Number for additional information. |
|
Packet Description Pattern |
The format of your packet description. If left blank, the description can be added manually during packet creation. |
|
Default Location |
The default location when adding a packet. If entered, this location will be automatically highlighted when adding a new packet. If you have permission and the Lock Location option is not selected, you can change the default location once the packet is created. |
|
Make Packet Description Required |
If checked, this setting requires the Packet Description to be entered before the system will save the packet data. |
|
Default Type |
The default type assigned to a new packet. If selected, this type will be automatically highlighted when adding a new packet. This field can be changed during packet creation. |
|
Default Facilities |
The default facility, if selected, will be highlighted automatically when creating a new packet. This field can be changed during packet creation. However, once the packet is created, you must have permissions to change it if the Lock Facility option has been selected. |
|
Set Next Sequence Number |
This option allows for setting the next sequential number for Form Groups. |
To edit a Form Group:
- Click Form Design under eForms on the Tools & Setup window.
The Form Group List page displays.
- Select the form group you would like to edit, and then click the Edit button.
The Form Group Detail page displays in edit mode.
- Make changes to the Form Group information.
- Click the Save button to save your changes.