Creating a Workflow
- Click Workflow design option under eForms on the Tools & Setup window.
- Click Add.
The New Workflow page displays.

- Enter the name and description.
- Select Form Packet for the Main Object Type.
- Click Save, then click Exit/Cancel.
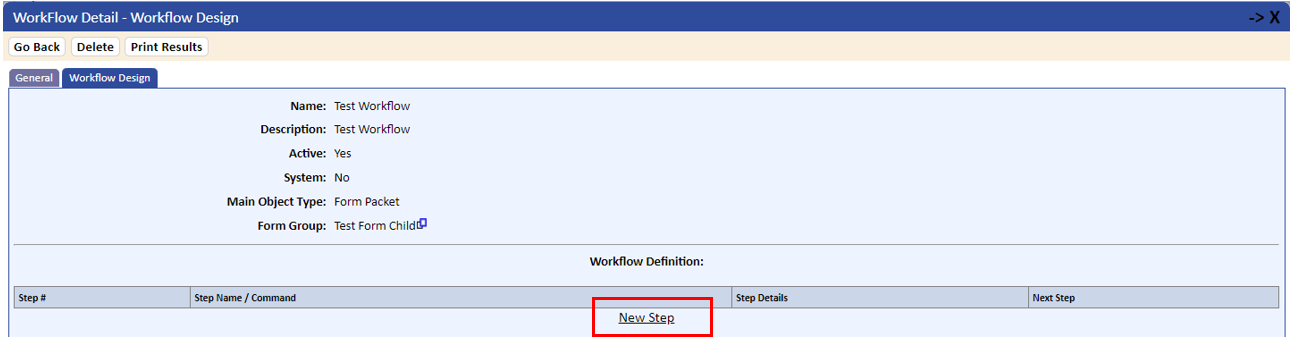
- Click the Workflow Design tab.
- Click the New Step link.
- To expand the workflow page to be a full page, and its on tab on the browser, click the arrow next to the X at the top right of the dialog.

- The first step of any form will be to create the packet. Fill in the Step Name, such as “New CAPA Creation.”
CAUTION: Once you have placed a form and workflow into production, do not change the Step Name entry. Also, do not use following characters in a Step Name entry: &, #, @, %.
- The first step in a workflow should be Create Packet, which is in the Command drop-down list.
- When finished entering the step, click the Save Step icon and then the Cancel button.
- Select the New Step link to add the next step.
The second step is usually a task such as “Fill in Data.”
- Select Send Activities (the default) in the Command Step drop-down list.
When Send Activities is selected, the Step Detail box displays. The step detail parameters are described in Step Detail Parameters on page 1.
- When you have completed the workflow, click the Save and then Cancel buttons to return to read-only mode for the Workflow Detail page.
- To automatically close a packet after a particular step, select Packet Command under the Command option. This will allow for selecting the Command Name of Close Packet. You can also automatically close a packet based on e-signature.
You can print the workflow design page by clicking Print Results.